We used to create content-rich e-commerce sites with Magento, but our clients loved being able edit their own website. So we decided it was time for something new and came up against the limits of what’s possible out-of-box in this platform.
Storyblok – Adobe Page Builder for Magento Open Source alternative
Last year Adobe finally made Page Builder available for Magento 2 Open Source. The previous Magento approach based on simple static blocks and widgets lacked intuitive, visual tooling suitable for most of the content management teams. It also created a lot more chores for developers to make it work as intended. For years developers were looking for better editing tools to easily provide and manage content for e-commerce businesses.
Interestingly many of them maybe even better suited for business than the built-in Page Builder previously known from the Commerce version. Some of them though fall short of expectations and anticipation outweighs the reality.
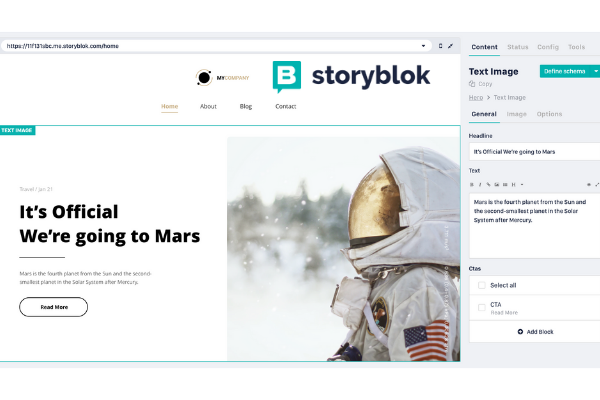
In this article, we will focus on one of the alternatives for Page Builder – Storyblok, whose creators claim that it’s “the world’s first headless CMS that works for both developers & business users“. Let’s verify it!
Content editor – account and pricing
It’s a headless CMS built around a Content Delivery API. It comes with a visual editor preview and ready to use components. Before diving in considers current Storyblok pricing per month:
- community: 0
- entry: $90
- teams $411
- enterprise: $2.999
Additional traffic is 190/month for 1 TB + Discount for nonprofits & educational institutions. For more information about provided functionalities for each price range go to https://www.storyblok.com/pricing
Storyblok unique features
What distinguishes this tool from many other Magento 2 third-party modules is that it actually can be integrated with many other platforms as well using their SDKs for Javascript, Ruby, PHP and many more. This way you can create omnichannel content for your statically generated landing page, mobile application or even IoT device.
Besides creating reusable components based on many default fields – from text to ready-to-use plugins – you can also actually create custom fields extending existing functionalities.
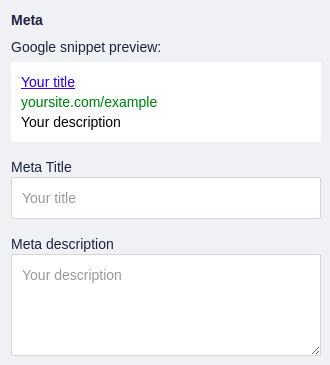
One of the greatest SEO built-in plugins is meta plugin which allows you to edit site metadata: title and description. It also features a simple Google snippet preview:
When it comes to SEO, Storyblok, similarly to Page Builder, supports image alt texts and powerful image service. It’s also worth knowing that pages created in Storyblok will be added to the default Magento sitemap generator. Its settings – frequency and priority – can be changed in Magento 2 Admin Panel: Stores → Configuration → Catalog → XML Sitemap → Storyblok Options:

Magento 2 integration step by step
Making it work for Magento couldn’t be simpler: all you really need is an active account in Storyblok and of course, Magento 2 project running on PHP 7.3+. The extension can be easily added via composer: https://marketplace.magento.com/medialounge-magento2-storyblok-integration.html. The whole process including creating example block is well described on https://www.storyblok.com/tp/integrate-storyblok-with-magento
Storyblok comes with many built-in field types: from the basic ones as boolean to more advanced like colour picker. Everything one may need to create custom reusable components which are the building blocks of every possible content here. Creating a custom component is really intuitive and every single component can be easily re-defined when using it – no need to switch back to another tab.
Hyvä Themes homepage with Storyblok
To better understand how Storyblok can help our business needs we will try to create a simple homepage. For the sake of this quick tutorial, we will use Magento 2.4.3 and Hyvä custom theme. You can read more about Hyva in our article Hyvä Themes – a new Magento e-commerce frontend software
Installation and the whole setup process is very well described in the official Storyblok Magento integration guide: https://www.storyblok.com/tp/integrate-storyblok-with-magento
Storyblok content creation tutorial
After creating our first space let’s skip the rest of the tutorial and dive deep into creating our content. Also, since this tutorial explains all the needed basics like creating blocks very well, let me make this a little bit more complicated: let’s create a homepage banner based on this simple design created in Shuffle: https://shuffle.dev/preview?project=0dce1aecbaca60dee8f121c9b9af4d763ab30fa6&page=index.html&screen=top&iframe=1
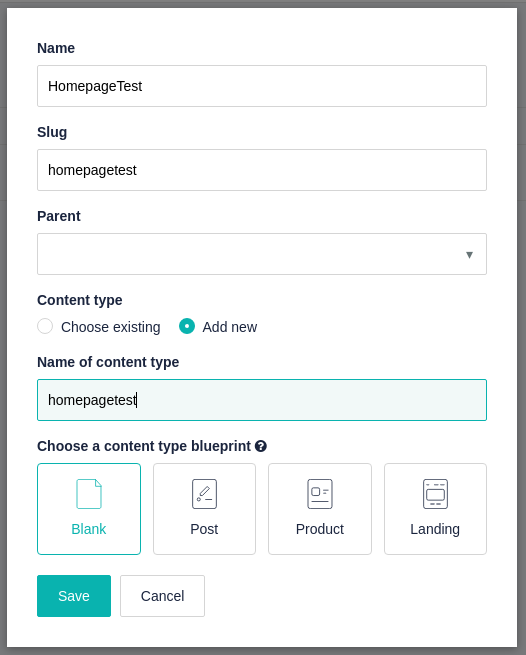
- To make this possible first we need to create a new Entry in Storyblok’s Content section. For this case we should create a new Content type using a blank blueprint as shown on the screenshot below:
2. And add a template for our new homepage element in a template folder like this:
app/design/frontend/PandaGroup/Custom/MediaLounge_Storyblok/templates/story/homepagetest.phtml
<?php

/** @var MediaLounge\Storyblok\Block\Container\Element $block */

?>

<?= $block->getChildHtml() ?>
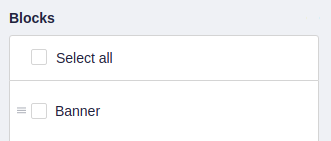
3. Now since our template is working we can start defining the schema of our first building block. It will enable us to make a place for adding components that can be shared across this project between different pages and views. Let’s just name it simply ‘Blocks’ as shown on the screenshot below:
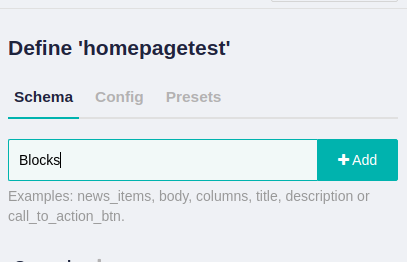
4. Click on our newly created schema item and change its type from default “Text” to “Blocks” so we can later add multiple different components inside. Now it’s time to start working on our first banner component!
5. Let’s get back to the Storyblok dashboard and go to the Components tab. Create a new component using the button in the top right corner and name it “banner”. Don’t change other default settings yet.
6. Similarly to creating homepagetest.phtml we need a template to use with the banner. Create a simple wrapper:
<?php

use Magento\Framework\Escaper;

/** @var MediaLounge\Storyblok\Block\Container\Element $block */

/** @var Escaper $escaper */

?>

<section class="py-20"><div class="container px-4 mx-auto">

   <h2 class="mb-8 text-5xl font-semibold md:mb-16 lg:text-6xl font-heading">

       <?= $escaper->escapeHtml($block->getTitle()) ?>

   </h2>

   <div class="flex flex-wrap items-center">

       <div class="inline-block max-w-xl mb-6 text-xl text-gray-500 md:mb-0">

           <?= $block->renderWysiwyg($block->getContent()) ?>

       </div>

       <a class="inline-block w-full px-12 py-4 ml-auto text-sm font-medium leading-normal text-center text-white bg-red-400 rounded md:w-auto hover:bg-red-300"

          href="<?= $escaper->escapeUrl($block->getButton()['url']) ?>"><?= $escaper->escapeHtml(__('Sign up')) ?></a>

   </div>

</section>
As you can see we used magic methods like $block->getFieldName() of component schema fields that we need to define. We can do it the same way as we previously did with the homepage. What we will need for our example banner is the following schema items:
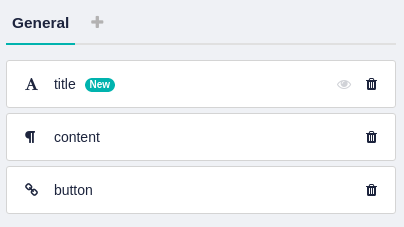
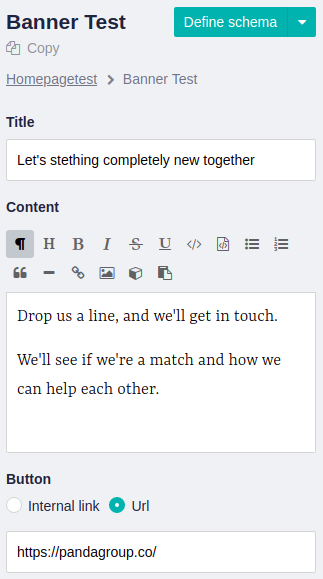
7. Now you can go back to your homepage content and newly created block ‘banner’ to your blocks and edit its fields:
Overall review
You have to build everything from scratch – every single custom block needs its own template which requires a lot of work but also gives a lot of freedom when it comes to the functionality and design of your content.
In fact – because Storyblok gives you only raw data such as WYSIWYG content or URL – it’s way easier to customize everything compared to the default Magento Page Builder. You are no longer limited to complicated boilerplates full of Knockout and uiComponents. Also, it’s easier to share blocks and components across many platforms – from mobile applications to IoT appliances.
 (No Ratings Yet)